2 Steps Away to Export / Import OST to Gmail Account to Upload OST File into Gmail
How to Import OST to Gmail Account? Are you also getting stucked in that situation where you want to migrate OST to Gmail account? Then, here we bring up the most reliable solution by which users can directly upload OST file into Gmail account without any hassle. This solution will enable you to transfer multiple OST files to Gmail account without any limitations. Go through the entire solution to move .ost file to Gmail account in 2 simple steps. Let’s know about the requirement and their solutions to perform migration from OST to Gmail account.
Requirement to Migrate OST to Gmail Account
As we all are already familiar with OST file and the Gmail account. Both OST and Gmail are popular emailing applications. OST is a file extension of popular desktop based email application i.e. Microsoft Outlook. Whereas, Gmail is a popular webmail application to manage mailing tasks.
However, there are several situations where users need to import OST file into Gmail account. Some of the common reasons are discussed below: –
- Gmail is a webmail application which permits user to access it from anywhere at any time. Whereas Microsoft Outlook requires specific configured system to access mailbox data.
- Once OST is created then it is not possible to open it in any other system. In that case, OST to Gmail migration will allow you to upload OST file to Gmail.
- OST file requires the proper connectivity of Exchange Server to follow continuity of account. Whereas Gmail stores its entire mailbox data on cloud.
- If you have OST file and want to upload OST file to Gmail account, then this OST to Gmail migration tool will make it for you.
How to Import OST to Gmail Account or Google Account?
In order to migrate from OST to Gmail account, you need to choose an intermediate solution. Users also must need to know that there is no direct or efficient method is available to transfer OST file to Gmail account. To export OST to Google Account, you need to first save OST data in reliable format using appropriate solution to prevent any mishappenings.
#1 Method to Migrate OST Mailbox to PC
Solution 1: Hassle-Free Solution to Export OST Mailbox
It is a professional solution for users to export OST mailbox into Personal Storage Table (PST) file. It is a simple and secured solution for users to move OST data in a secured file format to import OST file into Gmail account. It is recommended to choose ZOOK OST to PST Converter to convert .ost file into Outlook PST format. So, that users can efficiently migrate OST to Gmail account without Outlook.
Follow the simple procedure as discussed below to move OST mailbox to Google account: –
- Download and install the tool in your system.
- Choose required option to Select OST File / Folders from the system.
- Now, click on Browse button to set desired saving location.
- Last and the final step is to click on Convert button.
In couple of moments, the tool exports entire data saved in OST file into Personal Storage Table (PST file). Now, proceed the next solution to upload OST to Gmail account.
Solution 2: Move All Outlook OST Files
- In this solution, users need to open Microsoft Outlook in their system.
- Go to File >> Import and Export Option >> Export to a File and press Next button.
- Now, choose Personal File Folder (.pst) and press Next button.
- Choose Parent folder and sub-folders and then browse saving folder. At last click on Finish button.
Solution 3: Archive OST File
When user wishes to move entire OST mailbox of Outlook such as emails, contacts, calendars, tasks, etc. Therefore, it will be helpful in moving OST to Gmail account which is known as Auto-archive method.
- Launch Microsoft Outlook in your PC.
- Go to Tools >> Options >> Auto-Archive >> Press OK.
- Choose every option available for Auto-Archive Post and set number of days for it.
- Set location to save auto-archive file and press OK button.
#2 Method to Import Migrated OST File to Gmail Account
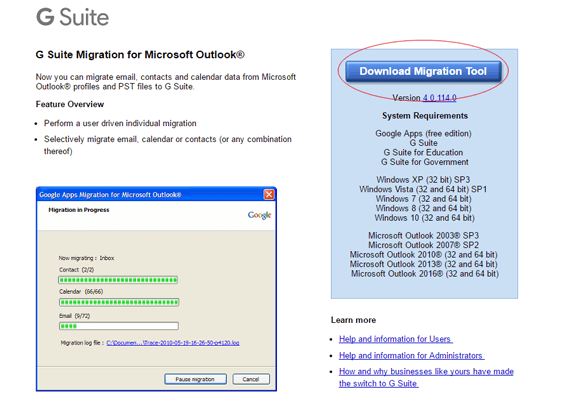
Using all possible methods, users are capable to export mailbox from OST file to specific file format. Now, users need to export PST file to Gmail account by using the Google’s GAMMO Tool. Gammo known as Google App Migration for MS Outlook which enables user to import OST files to Gmail directly. This permits user to export Outlook emails, contacts, calendars, tasks, notes, etc. to Gmail account. Follow the simple steps as given below: –
- Download and install the Gammo Tool in your PC.
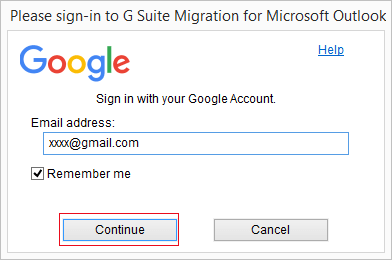
- Open Gammo tool and enter your valid email address and press continue.
- Provide valid account details and click on Allow button.

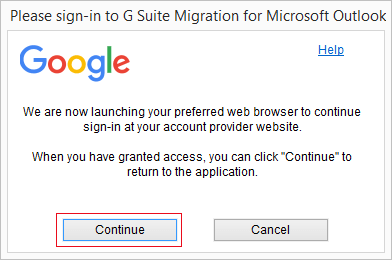
- User’s account will ask for authentication to access Gammo application. Click on Continue button.
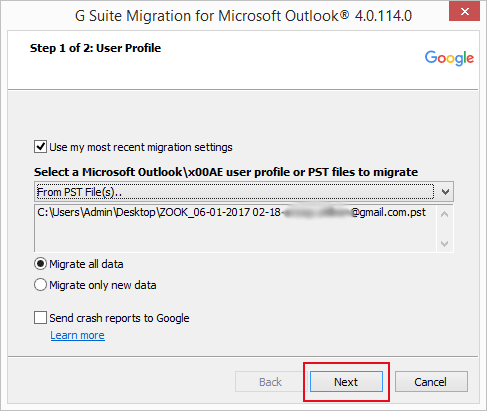
- In new Window, mark Use my most recent migration settings to choose PST File(s)… and migrate all data And then finally click on Next button.
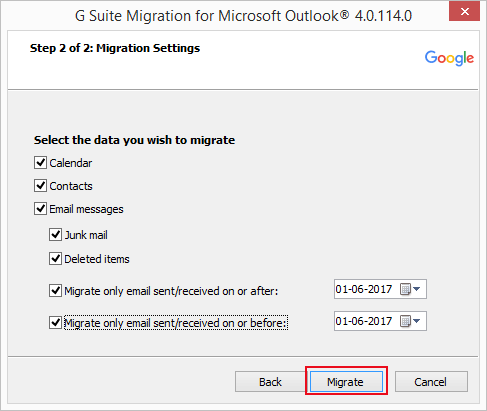
- Now, choose desired options which you wish to migrate. And then click on a Migrate button.
- When the process is done click on OK button.
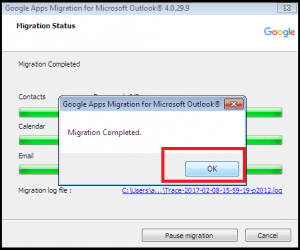
In couple of moments, the tool completely exports OST to Gmail account along with emails, contacts, calendars, etc. It is the best way to directly import OST to Gmail account without any alteration of data.
Final Words
In this article, we have described a proficient solution to migrate OST to Gmail account. In today’s era, most of the users are looking to move Gmail webmail account as it is a free and a web based email application. Therefore, the tool will be helpful to directly upload OST to Gmail account. It is the best way to import OST to Gmail account without losing any data items. With these solutions, users can effortlessly migrate data from OST to Gmail account in an easy way. Overall, its a simple, reliable and effortless way to export OST files to Google Mail account in few simple steps.

